The Visa Pack
 The first thing to know is that you cannot do anything about your visa until you receive notification from Disney (via Yummy Jobs). You will receive your I-797B form in this pack which is Disney’s petition to the US government to let you come and work in the USA – by the time you receive it the US Immigration authorities have already agreed, in principle, to you coming. You just have to go to the Embassy so they can check out that everything that Disney told them was the truth and that you are not hiding anything from them.

Also within the pack is the white I-94 card which Disney have kindly already filled in some of the details. You don’t need this to apply for the visa but this is your landing card for when you travel to the USA. This is not critical now so it is worth filing it somewhere safe for when you actually leave for your program. My pack also contained a letter from Disney Immigration Compliance (the department at Disney that deal with everything to do with Visas and foreign workers) and an instruction sheet on what should be written on the I94 card when you go through immigration at a US airport – it is worth reading both in full as they contain useful information.
The next thing I recommend that you do is download Yummy Jobs’ instructions from the Documents area of their website (you have to login to do this). They take you through step by step what you need to do. While I will go through what I believe the steps are below you should read all the Yummy Jobs instructions as well as the information from Disney and the US Embassy as the process regularly changes and everybody’s circumstances are different. I have gone through the process 3 times and every time something has changed so READ THE INSTRUCTIONS (Sorry for the shouting, it won’t happen again… I promise!).
Booking your appointment
 Now that you have your pack you are ready to book your appointment. To do this you have to phone a premium rate number which you can find on the US Embassy website and in the Yummy Jobs instructions, this costs more than £1.20 per minute so it is worth having all of your documents ready before you call to make sure it is as quick as possible. You will need the I797 form, your passport, a postal address, a phone number and an email address as well as credit or debit card details to pay the $150 processing fee. When you call up you will be asked what kind of visa you are applying for (Q1 for the CRP from the UK) and they will also need details from you I797 form and your passport number. If you have had a US visa before they may already have your details on file (they did for me) which makes the thing a bit quicker. You will then be offered an appointment time, I believe all the London Q1 visa appointments are either 8am or 8.30am on weekdays.
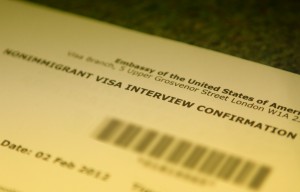
  You will then need to give your card details to pay the Machine Readable Visa (MRV) Fee, the $150 charge and then you are done. You will be emailed a receipt for the MRV fee and an appointment letter, you must check these are correct and print them out to take to the embassy with you.
Once you have your appointment you are ready to start on the Visa Application Form.
The DS-160 Form
The form is the DS-160 form which is actually an online system where you enter all of your information. The form can be found here. You must select the embassy you are attending (London, England for most UK applicants) and then choose to start a new form. At this point you will be given an application number, WRITE THIS DOWN (Sorry, more shouting), you will need this to retrieve your application if the website crashes, which is quite likely. You also need it if you go away to find information and need to log in again.
To fill out the form you need will need your passport and any old passports you have, your US Social security number (if you have one) and details of the exact dates and addresses of the last 3 jobs you have had as well as the dates and addresses of every educational establishment (school, college, university etc) you have attended since the age of 11. The form is intelligent and it only shows the information you need to fill in based on your answers, for example some people may not need to enter educational information while others will. Go with the flow of what you are asked and don’t worry if it is not exactly the same questions as everybody else.
The toughest questions to find answers too are the dates of your last 5 visits to the USA – I for example had to find my passport from when I was 7 to find the exact date of entry. The form is not difficult to fill in, it is just a bit time consuming. Details of employment such as the address of the Disney offices and the contact person are included in the Yummy Jobs instructions. It also has the address you will be staying at in the USA. Explanations of how to answer some of the more difficult questions are also there.
2 important things to note for UK applicants, the city of issue of a British passport issued in the UK is UK Passport Agency since British passports are not issued in a city and if you have had any US Visa the visa number they ask for is the red number in the botttom right hand corner.
You may be asked for your expected US Wage, I have always taken the minimum hours per week (30 for the CRP) multiplied it by the pay rate and then multiplied that by 4 to get the monthly rate and they have never questioned it.
Once you get through the, often slightly surreal, security questions you will need to upload a photo. This is where a lot of people get stuck so I shall give my top tips to sail through first time.
The Photo
You must at least try and submit a digital photo, if it fails you can take a printed photo to your appointment. US Visa photos are not standard UK passport photos, they are square 2 inches by 2 inches and there are strict requirements about where your eyes must be and how large your head needs to be. Luckily the US Embassy have created a tool which will take a photo and allow you to scale it to the right size and then create exactly the image file to upload.
If you use this tool all you need to do is take a wide photo of yourself against a white wall, tips here are stand with your back against the wall and get someone to take a photo with the flash on full power from directly in front of you. This should stop any shadows which won’t be accepted but the embassy. Once you have the photo upload it to the editing tool, which you can find here, use the scale bar to make your head the right size and move the image until your face fits within the guides. Click crop photo and then save the image to your computer. You can now upload this photo to the DS-160 form and it should be exactly the right size.
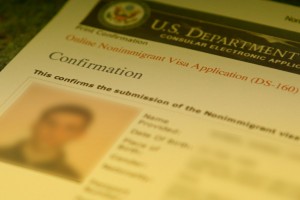
 After you have uploaded the photo you just have to review the form and submit it. Once you it has been received you will be sent to a confirmation page which you need to print out, if you do not have a printer connected to your computer you can have it emailed to you to print later. You will need to take just the confirmation to the interview, they have all the details electronically.
If you need to get printed photos because you could not get an electronic one to work there are 2 places close to the embassy to get them done – Passport Photo Service on Oxford Street or Gould Pharmacy just down the road from the embassy – they are not cheap though! Most other places won’t be able to do the 2″x2″ size that the embassy need.
Going to the Embassy
The US Embassy in London is in Grosvenor Square which is just off Oxford Street opposite Selfridges. Before you go you need to make sure you have everything you need:
- Appointment Letter
- MRV Fee Receipt
- Passport
- I-797 Form
- DS-160 confirmation page
- Photo (even if you managed to upload one online it might be an idea to take a printed one in case there is a problem)
- Job Offer Letter from Disney – from the original pack you received – it is extra proof you have the job if they have questions
- Credit or Debit Card (Not American Express) to pay for the courier to bring your passport back
- A pen to fill in the courier paperwork
You cannot take any electronic items of any kind into the embassy, including wrist watches, mobile phones, car keys or key fobs. I live in London so I could get away with leaving them at home, if you have to travel to London you can your bag in either luggage storage at one of the train stations or both Gould Pharmacy and the Photo Service listed above offer storage lockers where you can leave your valuables.
The Embassy Appointment
You can only arrive for your appointment 30 minutes before your allocated time. You will have to wait outside for a time, even when it is very cold or raining, so dress appropriately. They will first check your documents to make sure you have everything you need and you will then pass through security who will check your passport and x-ray your belongings. Once you pass through security you follow the Visa signs and enter the reception. The receptionists checks your paperwork and will give you a sticker with a number on it. You take a seat in the waiting area and wait for your number to be called.
Once you are called to a window the clerk will take all of your documents and check them. They will also take your fingerprints – it is very important that you look after your fingers in the weeks before you go to the embassy, any cuts or blisters mean they cannot take prints and you will have to come back for another appointment. Assuming everything is in order, they will give you a courier form to fill in with your name and address so they can send your passport back to you. You can fill this in while you sit down to wait for your number to be called a second time. While you are waiting the embassy are checking through your documents and deciding whether to issue a visa.
For the first window the number are usually called roughly in sequence. For the second set it is a bit more random as different types of visas take different amounts of time to be processed. It may feel like you have been forgotten, you haven’t, it is just that work visas take longer than some other types. When you are called to the second window you will speak with a Consular Officer who will probably ask you a few questions about yourself and why you want to travel to the USA before telling you the status of your visa. Hopefully they will tell you it is approved, it normally is! All you have to do then is take the blue form to the courier desk and pay the courier fee.
The standard charge is just under £15 for delivery any time before 6pm. You can pay extra to have it guaranteed before noon, 10am or 8am. I had to go for 8am which cost a little over £30. Once you have paid you are free to go and your visa will follow on in 5 to 10 days.
That’s where I am up to now… my passport should be back next week and then it will be just 6 weeks until I leave – still so much to do! This weekend will probably be spent doing some more shopping…
The content of this post is based on my own experience and should not be relied upon. The visa process is always changing so your best sources of information are the US Embassy website, the Yummy Jobs instructions and information from Disney Immigration Compliance. It is important that you read all official instructions and follow them.
Scroll Down for another archive post after the break


